 EN
EN  FR
FR  NL
NL  DE
DE How to do a home manicure?
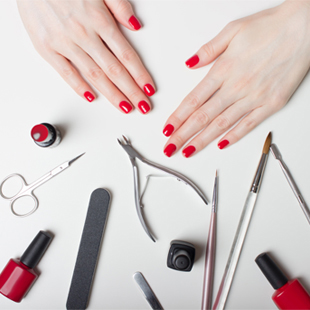
We all dream of having beautiful nails without having to make a special trip to a proper salon. We don’t always have the time or the money. The good news is that it is still possible to have a home manicure worthy of a professional. To do so, you just need to follow the various steps and have the right tools.
What are the various steps involved in a home manicure?
TO GIVE YOURSELF A HOME MANICURE, IT IS ESSENTIAL TO FOLLOW THESE VARIOUS STEPS:
1. PROPERLY REMOVE THE OLD VARNISH (OR THE REMAINS OF THE VARNISH)
For a successful home manicure, start by removing the old varnish using a mild remover with no acetone. Check carefully that there are no traces of varnish left and clean your hands and nails well.
2. FILE
This step of the home manicure will speed things up and give shape to your nails. Rounded, squared, almond-shaped or stiletto - there is something for every taste. Be sure to choose a shape that suits the shape of your fingers. For example, you would choose a rounded rather than a square shape to narrow the hands.
3. SOFTEN THE SKIN
To move on to the fourth step properly, put your hands in a small bowl of lukewarm water to soften small, unsightly pieces of skin so they can be removed more easily.
4. PUSH BACK THE CUTICLES
Delicately push back the cuticles using a small wooden stick or the pusher supplied for this purpose in the manicure set. This step, which is essential for a successful home manicure, enables the small pieces of skin to be pushed back, visually enhancing the shape of the nail.
5. POLISH
If your nails show small irregularities or patches, the polishing step will enable you to put the shine and a uniform colour back into them. But be careful not to overdo it at the risk of making your nails fragile. This step of the home manicure can be very easy to do thanks to the pusher provided in the manicure set.
6. HYDRATE THE HANDS
Always hydrate your hands using a dedicated cream. Work into the nails well by rubbing in small curved movements. You can also go up as far as the crook of the elbow to hydrate your hands and forearms.
7. APPLY A BASE COAT
Once the cleansing steps of the home manicure have been completed, it is time to move on to the varnishing step (if you that’s what you want). Always start by applying a base coat to protect your nails and strengthen them.
8. APPLY THE VARNISH
Apply the first coat of varnish and let it dry for ten minutes or so, or use a purpose-designed nail dryer. Repeat the operation by applying a slightly thicker coat. This will only make your manicure more striking and resistant.
9. FINISH WITH THE TOP COAT
Finally, finish with a top coat. This step will give your home manicure a more beautiful shine and a long life.
Which tools are essential for a successful home manicure?
- Remover
- A small bowl of lukewarm water
- A nail file
- A cuticle pusher
- A polisher
- A base coat
- A coloured varnish
- A top coat
You can find the essential tools in many of our manicure sets. Find them here for success with your future home manicures - like a pro!